Shawn's PTC swirl thread was a fun progression from rough start to finished product. I thought I'd do the same with my project which I started just over 3 years ago...
When I consolidated my household with my sweetie, I lost my studio space. I was renting a house and she was buying a house, so we decided that her's was the place for us.
The first obstacle was that with both of us being on the high side of 50, we just had too much stuff between us. Even with countless trips to the dump and Goodwill, we managed to transform the garage and full (unfinished) basement from piles of 'stuff' to stuffed with things we didn't throw out or give away.
Well, an unfinished basement is a mixed blessing - you can put lots of things down there, but will you ever see them again?
So, I took on the job of building in the basement. I started small (and smart, I think) with a powder room. There would be no running up the stairs for nature and getting distracted with TV or some other project while I was working.
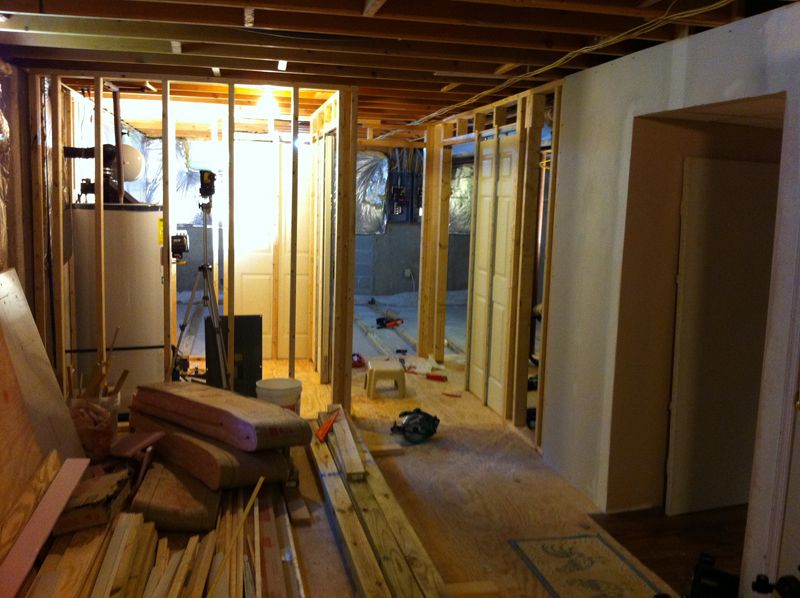
With the powder room done, I moved on to a storage room, then to a cedar closet under the stairs, a shop, a hallway with nooks for freezers and bookcases. Then it was on to a second hallway, a laundry room, a closet around the water heater with room for more shelving units, a closet around the breaker boxes and an entertainment room with kitchenette.
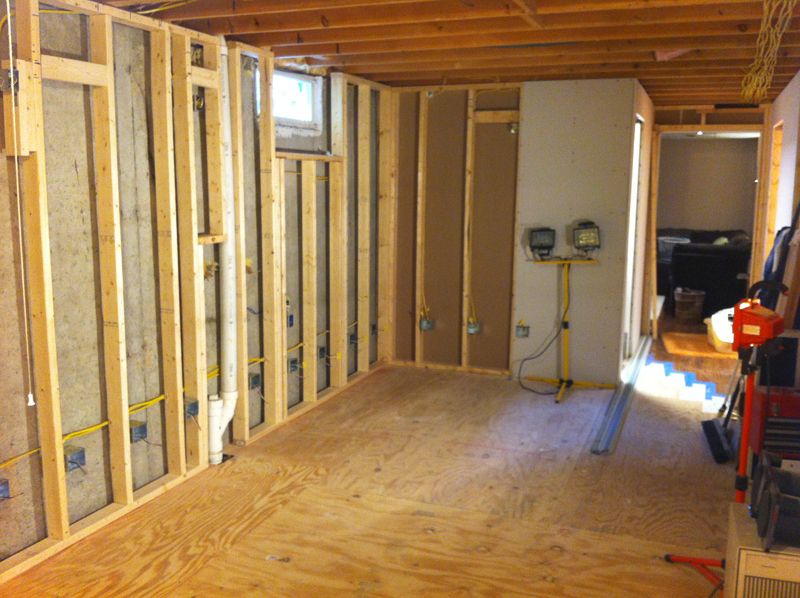
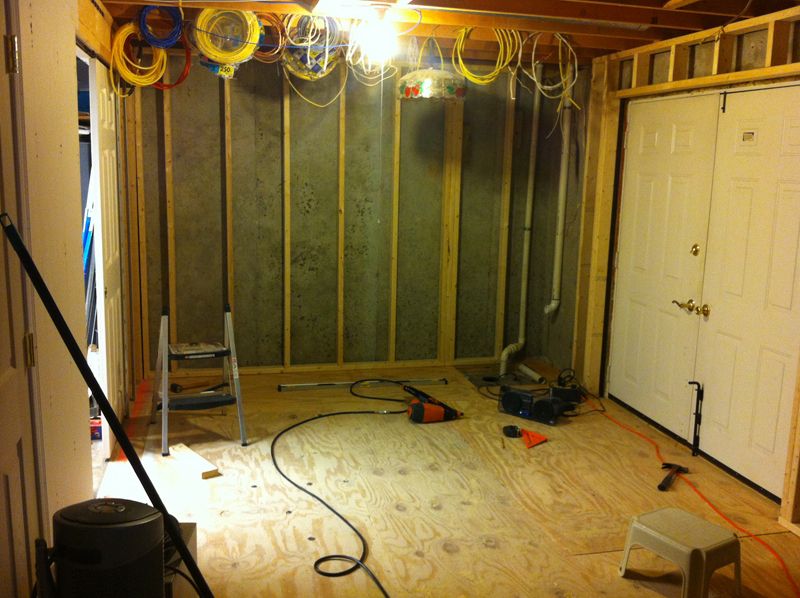
That left the current project, my music studio. Except for plumbing, every room in the basement proceeded along the lines of what I will show you here.
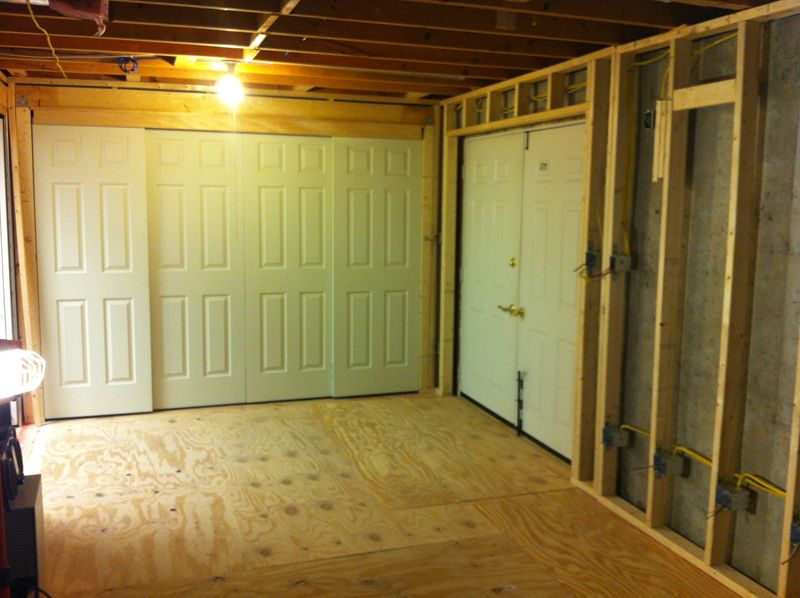
The starting place for all was concrete floor, concrete walls with insulation tacked to the upper half and joist ceilings. There was a rough in for the business end of a toilet and one (1) 15 amp circuit of electricity powering bare bulb fixtures and only a couple of outlets.
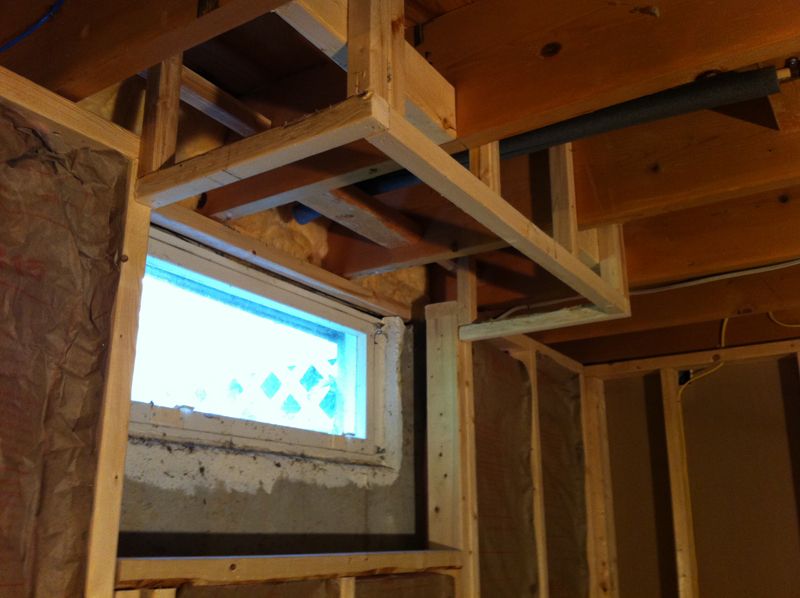
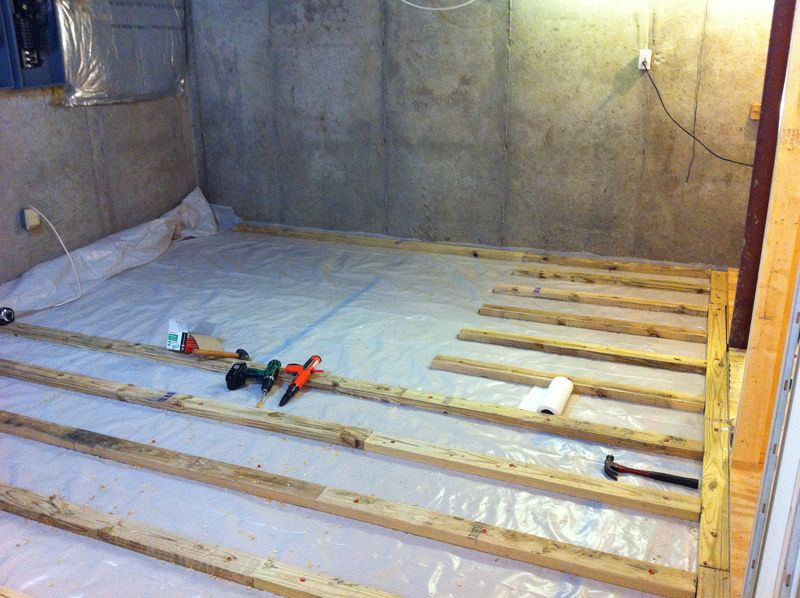
On to the studio which I started less than a month ago. The first thing needed was a cozy floor. We wanted to be able to go into the basement on cold winter mornings barefoot. so, an insulated floor had to be installed.
Vapor barrier, pressure-treated 2x4s on their sides 'shot' into the cement with .27 calibre power 5 nails (insert Tim Allen grunt here).
Insulation provided by carefully cut closed core foam panels.
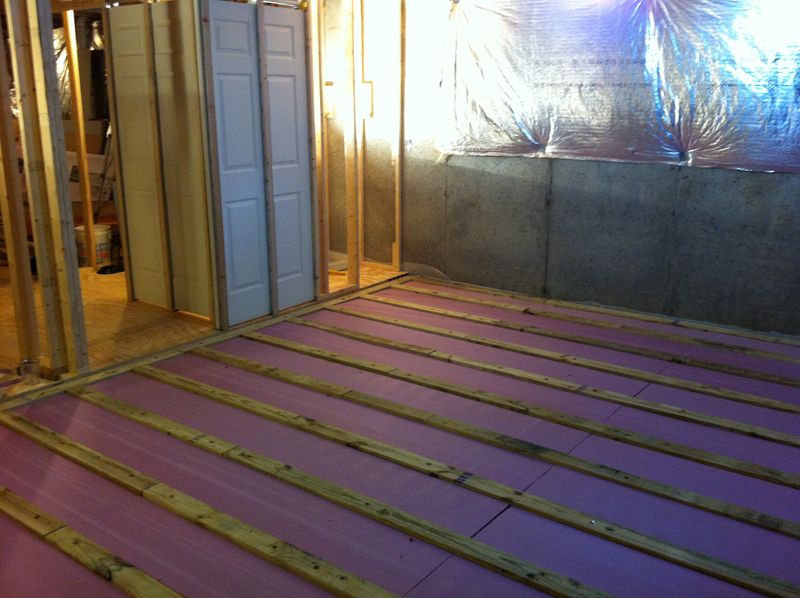
3/4 plywood then nailed and screwed to the 2x4s. The above 2 pics are from the entertainment/kitchenette section, but the process was the same for the entire floor.
This is how it starts. I'm way past this part now and will be giving you pics in increments.
I hope you enjoy the process. I'd also be happy to answer questions about details if you have them.
When I consolidated my household with my sweetie, I lost my studio space. I was renting a house and she was buying a house, so we decided that her's was the place for us.
The first obstacle was that with both of us being on the high side of 50, we just had too much stuff between us. Even with countless trips to the dump and Goodwill, we managed to transform the garage and full (unfinished) basement from piles of 'stuff' to stuffed with things we didn't throw out or give away.
Well, an unfinished basement is a mixed blessing - you can put lots of things down there, but will you ever see them again?
So, I took on the job of building in the basement. I started small (and smart, I think) with a powder room. There would be no running up the stairs for nature and getting distracted with TV or some other project while I was working.
With the powder room done, I moved on to a storage room, then to a cedar closet under the stairs, a shop, a hallway with nooks for freezers and bookcases. Then it was on to a second hallway, a laundry room, a closet around the water heater with room for more shelving units, a closet around the breaker boxes and an entertainment room with kitchenette.
That left the current project, my music studio. Except for plumbing, every room in the basement proceeded along the lines of what I will show you here.
The starting place for all was concrete floor, concrete walls with insulation tacked to the upper half and joist ceilings. There was a rough in for the business end of a toilet and one (1) 15 amp circuit of electricity powering bare bulb fixtures and only a couple of outlets.
On to the studio which I started less than a month ago. The first thing needed was a cozy floor. We wanted to be able to go into the basement on cold winter mornings barefoot. so, an insulated floor had to be installed.
Vapor barrier, pressure-treated 2x4s on their sides 'shot' into the cement with .27 calibre power 5 nails (insert Tim Allen grunt here).
Insulation provided by carefully cut closed core foam panels.
3/4 plywood then nailed and screwed to the 2x4s. The above 2 pics are from the entertainment/kitchenette section, but the process was the same for the entire floor.
This is how it starts. I'm way past this part now and will be giving you pics in increments.
I hope you enjoy the process. I'd also be happy to answer questions about details if you have them.
Last edited:
")