
You are using an out of date browser. It may not display this or other websites correctly.
You should upgrade or use an alternative browser.
You should upgrade or use an alternative browser.
Headstock Logo Glue?
- Thread starter Kred
- Start date
Maxime Bousquet
--broken but under repair--
Hi Kred, curious to see this! can you take a picture, several glues would do, it's avoiding overflows that must be tricky.
DISTORT6
NJ Devil
Maxime Bousquet
--broken but under repair--
Imgur , free.
Erick_S
New Member
PRS doesn't use "glue". The decals are metallic with adhesive backs...basically, a metal foil sticker. PRS's PTC will replace them for around $50, but you will have to get your guitar to the factory in Stevensville, MD. When they replace a decal, they can only replace it with the current style. They don't install older-style decals (I've asked them). 0Otherwise, you can order an aftermarket decal. There are some good ones out there. I ordered some from Canada, China, and Russia...I wanted chrome/silver decals, which the PTC doesn't offer (it's gold or black). If you want to preserve the old logo, I recommend using 3M dual-sided adhesive paper. Luthiers often use it for pickguard install on acoustics. I have used it to "restore" adhesive to the back of decals, labels, and other stickers. You will need to be exceptionally careful - the letters are delicate. Use a cotton swab soaked in naptha to remove all the old adhesive from the back of the letter. Once complete, place the letter back onto the 3M paper, cover with non-stick parchment paper, and gently press on the letter to ensure good adhesion. At that point, use an X-acto knife to carefully trim away the excess 3M paper. When complete, use a short strip of Scotch Tape to hold the letter, then peel off the 3M backing, use the tape as a "holder" to position the letter, then press firmly onto the headstock and gently peel away the Scotch Tape. Then press the letter firmly a few times to ensure solid contact.
dmatthews
Dave's not here
Ask PTC
[email protected]
[email protected]
JasonE
New Member
Many of their guitars have rosewood headstock overlays with an inlayed signature on them. I am sure that is what the OP has.PRS doesn't use "glue". The decals are metallic with adhesive backs...basically, a metal foil sticker. PRS's PTC will replace them for around $50, but you will have to get your guitar to the factory in Stevensville, MD. When they replace a decal, they can only replace it with the current style. They don't install older-style decals (I've asked them). 0Otherwise, you can order an aftermarket decal. There are some good ones out there. I ordered some from Canada, China, and Russia...I wanted chrome/silver decals, which the PTC doesn't offer (it's gold or black). If you want to preserve the old logo, I recommend using 3M dual-sided adhesive paper. Luthiers often use it for pickguard install on acoustics. I have used it to "restore" adhesive to the back of decals, labels, and other stickers. You will need to be exceptionally careful - the letters are delicate. Use a cotton swab soaked in naptha to remove all the old adhesive from the back of the letter. Once complete, place the letter back onto the 3M paper, cover with non-stick parchment paper, and gently press on the letter to ensure good adhesion. At that point, use an X-acto knife to carefully trim away the excess 3M paper. When complete, use a short strip of Scotch Tape to hold the letter, then peel off the 3M backing, use the tape as a "holder" to position the letter, then press firmly onto the headstock and gently peel away the Scotch Tape. Then press the letter firmly a few times to ensure solid contact.
Many of their guitars have rosewood headstock overlays with an inlayed signature on them. I am sure that is what the OP has.
Doubtful. Tose inlayes are set with crazy glue. I can't remember ever hearing of any of them coming loose.
The foil decals, otoh... They are known to loosen with certain cleaning solvents...
Alnus Rubra
Loving nature’s wonders
You could try using a hairdryer to gently warm up the adhesive and re-locate it back into place.
Black Plaid
Other Alan!
Just make sure to protect the rest of the inlay with paper or something to deflect the heat!
You could try using a hairdryer to gently warm up the adhesive and re-locate it back into place.
aphantomvaper
Bend it to the Owl!
Yikes, that's some delicate lettering. Good luck, I'd have to put the P aside until it gets to PTC. That P is really thin.
Before you attempt to do anything yourself, take it to a local dealer. I had this happen on my first PRS, a McCarty. It had one of the gold foil logos. I took it to the dealer, and they ordered the decal from PRS. Within a week or so, it came in. I brought the guitar in, and they repaired it. I would suggest the same, if you have a dealer nearby. Even if you didn't buy it there, they should have a means to repair it.
Successful logo repair! Thanks for everyone's help and advice. Here is what I did...
Supplies - X-Acto knife (sharp), Scotch double-sided tape, and Reynolds Cut-Rite wax paper (from the kitchen).
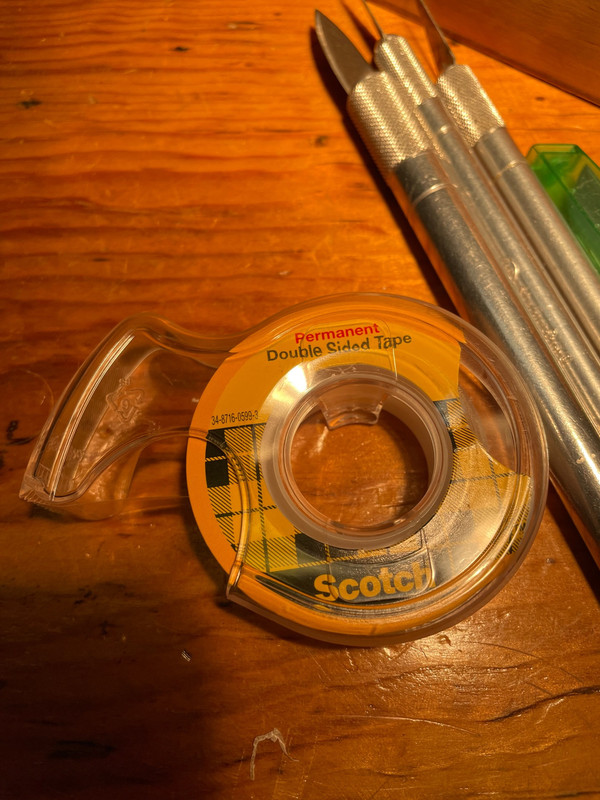
Using the knife edge, carefully scrape the old adhesive off the back of the metal logo. Tape the wax paper to a paper pad, put some double-sided tape on the wax paper, and stick the metal logo on the double-sided tape. Carefully cut out the inside of the logo (see pic below).

Carefully cut around the outside of the logo and trim all the excess double-sided tape. As you can see from the cut marks, I did a lot of trimming. The pic below is the back of the logo with the wax paper still covering the double-sided tape.
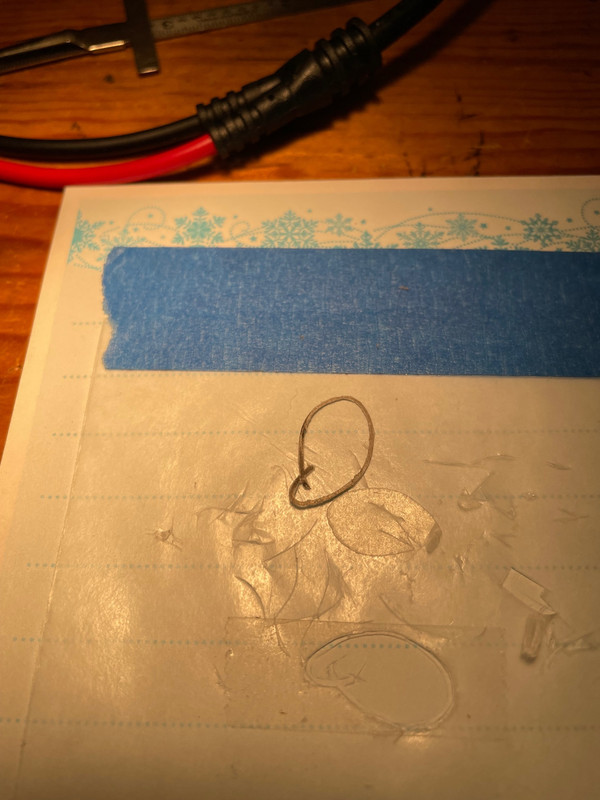
Using the knife, carefully separate the wax paper from double-sided tape on the logo back. I got it started with the knife and then pulled the wax paper back with my fingers. Now the logo is ready to apply. It looks pretty much like the original adhesive backing.
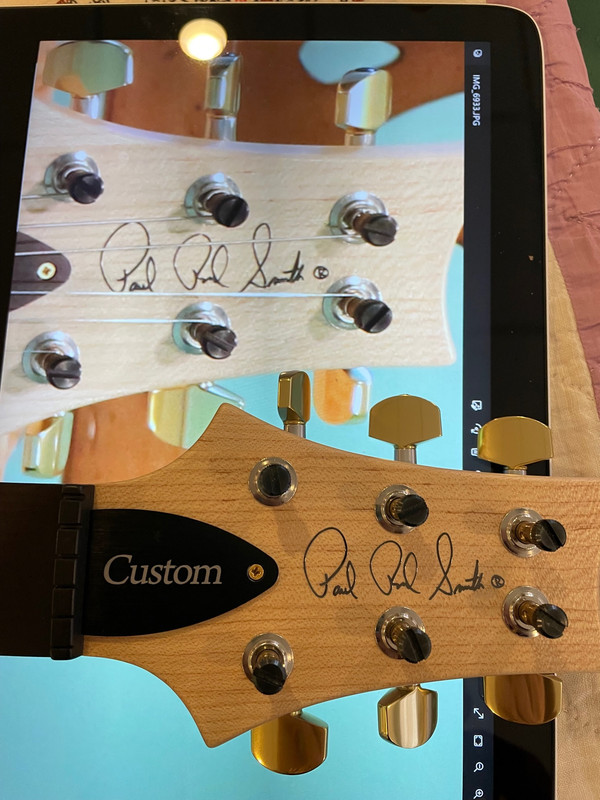
Using the knife, carefully move the logo into alignment with the old adhesive marks on the headstock and/or any original pictures. Press the logo down using a microfiber towel.
Supplies - X-Acto knife (sharp), Scotch double-sided tape, and Reynolds Cut-Rite wax paper (from the kitchen).
Using the knife edge, carefully scrape the old adhesive off the back of the metal logo. Tape the wax paper to a paper pad, put some double-sided tape on the wax paper, and stick the metal logo on the double-sided tape. Carefully cut out the inside of the logo (see pic below).
Carefully cut around the outside of the logo and trim all the excess double-sided tape. As you can see from the cut marks, I did a lot of trimming. The pic below is the back of the logo with the wax paper still covering the double-sided tape.
Using the knife, carefully separate the wax paper from double-sided tape on the logo back. I got it started with the knife and then pulled the wax paper back with my fingers. Now the logo is ready to apply. It looks pretty much like the original adhesive backing.
Using the knife, carefully move the logo into alignment with the old adhesive marks on the headstock and/or any original pictures. Press the logo down using a microfiber towel.
Last edited:
Moondog Wily
Howlin' At The Moon!
Looks killer! Great job!! Congrats on a successful DIY!!!Successful logo repair! Thanks for everyone's help and advice. Here is what I did...
Supplies - X-Acto knife (sharp), Scotch double-sided tape, and Reynolds Cut-Rite wax paper (from the kitchen).
Using the knife edge, carefully scrape the old adhesive off the back of the metal logo. Tape the wax paper to a paper pad, put some double-sided tape on the wax paper, and stick the metal logo on the double-sided tape. Carefully cut out the inside of the logo (see pic below).
Carefully cut around the outside of the logo and trim all the excess double-sided tape. As you can see from the cut marks, I did a lot of trimming. The pic below is the back of the logo with the wax paper still covering the double-sided tape.
Using the knife, carefully separate the wax paper from double-sided tape on the logo back. I got it started with the knife and then pulled the wax paper back with my fingers. Now the logo is ready to apply. It looks pretty much like the original adhesive backing.
Using the knife, carefully move the logo into alignment with the old adhesive marks on the headstock and/or any original pictures. Press the logo down using a microfibe towel.
Last edited:
Mike Duncan
DGT Player
I have a missing piece on my 14 year old DGT.
Alnus Rubra
Loving nature’s wonders
Great work, congratulations.
DISTORT6
NJ Devil
Should’ve been a surgeon!
Killer job.")
Killer job.
dmatthews
Dave's not here
Brilliant!Successful logo repair! Thanks for everyone's help and advice. Here is what I did...
Supplies - X-Acto knife (sharp), Scotch double-sided tape, and Reynolds Cut-Rite wax paper (from the kitchen).
Using the knife edge, carefully scrape the old adhesive off the back of the metal logo. Tape the wax paper to a paper pad, put some double-sided tape on the wax paper, and stick the metal logo on the double-sided tape. Carefully cut out the inside of the logo (see pic below).
Carefully cut around the outside of the logo and trim all the excess double-sided tape. As you can see from the cut marks, I did a lot of trimming. The pic below is the back of the logo with the wax paper still covering the double-sided tape.
Using the knife, carefully separate the wax paper from double-sided tape on the logo back. I got it started with the knife and then pulled the wax paper back with my fingers. Now the logo is ready to apply. It looks pretty much like the original adhesive backing.
Using the knife, carefully move the logo into alignment with the old adhesive marks on the headstock and/or any original pictures. Press the logo down using a microfiber towel.
Similar threads
- Replies
- 4
- Views
- 167
- Replies
- 33
- Views
- 1K
- Replies
- 30
- Views
- 787