
ThePod
New Member
- Joined
- Aug 13, 2018
- Messages
- 41
I was never fully happy with the tuning stability of my PRS SE Custom 24. Despite changing the nut and doing all the tricks on this forum. However, I do really like the feel and look of the guitar so I decided to take a shot at installing an Evertune bridge. They seem to get good reviews on many of the youtube channels. What could possibly go wrong!
Here is the guitar in it's native form. It's the sexy one on the left next to the sexy one on the right.
 2018-10-25_09-33-16 by ThePod, on Flickr
All the hardware off and taped up for safety.
 IMG_20210228_152102826 by ThePod, on Flickr
This mod is not for the faint of heart and is irreversible. So here we go. I watched and re-watched the video on the Evertune website before making any cuts.
I used these bits from Amazon and borrowed my friends router.
https://www.amazon.com/gp/product/B085T27P3Q/ref=ppx_yo_dt_b_asin_title_o00_s00?ie=UTF8&psc=1
I bought the routing templates as well as the bridge straight of of the Evertune website.
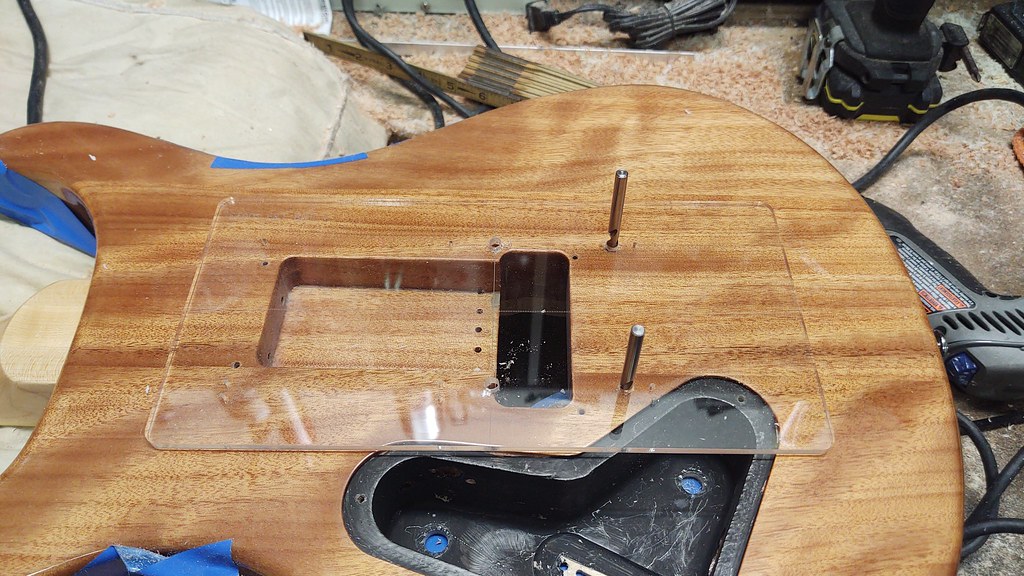
These are the top templates. I drilled the four large holes after making sure everything lined up nice and straight.
 IMG_20210307_184813633 by ThePod, on Flickr
Missed a photo here, but I drilled and chiseled out a little section of the base of the top wood (red square) and glued it in place to fill the area not be covered after the bridge was installed.
 51018413821_0e21a31741_o by ThePod, on Flickr
 IMG_20210307_185123765 by ThePod, on Flickr
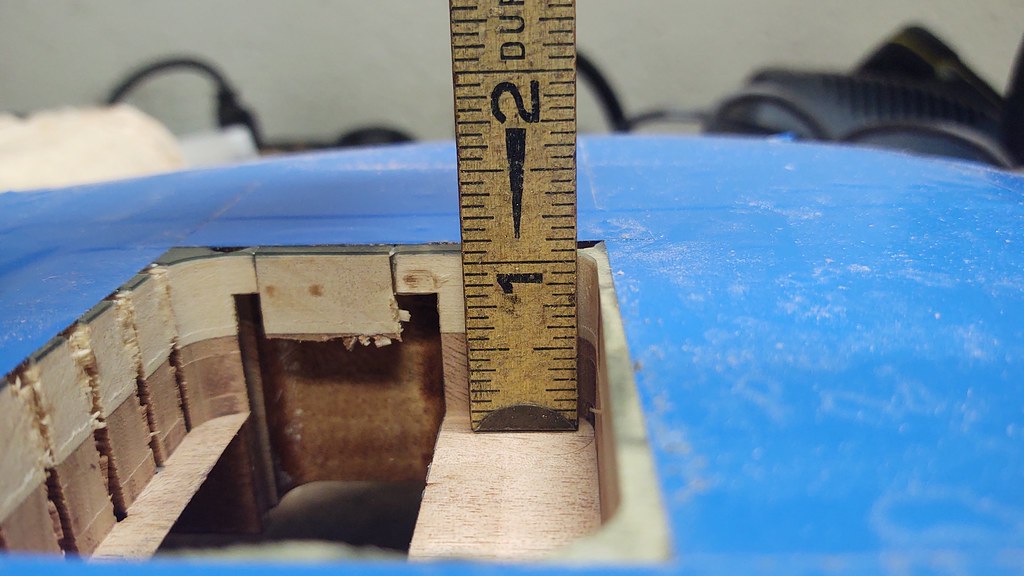
Then I began to fully route out the top to a depth of 1 inch. I spazzed a little here and made an oopsie, not a problem because this will be covered under the bridge.
 IMG_20210307_191311885 by ThePod, on Flickr
Opposite side view
 IMG_20210307_191319009 by ThePod, on Flickr
After a few choice words I routed the top out to a depth of 1 inch.
 IMG_20210307_195926799 by ThePod, on Flickr
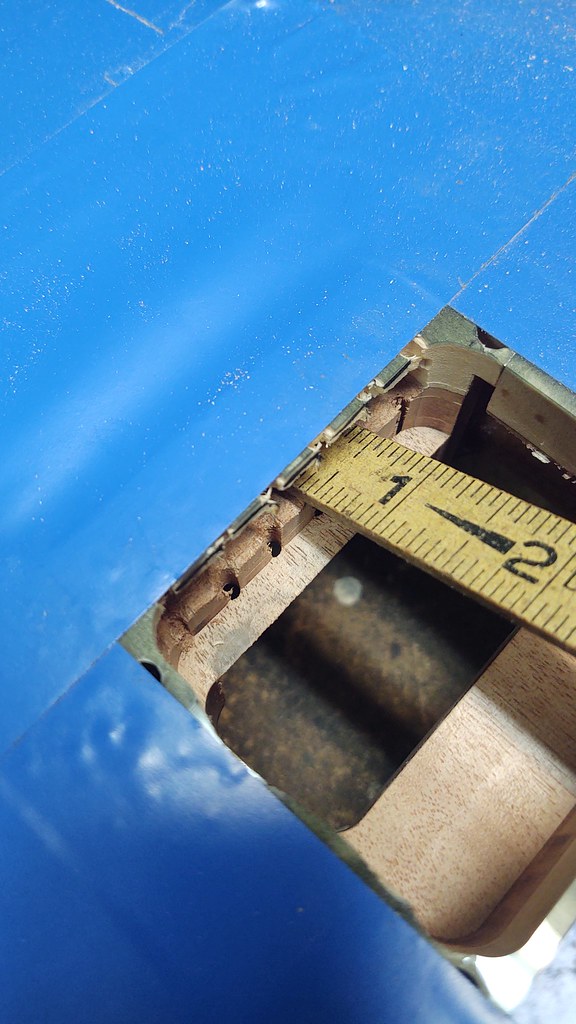
Chamfer cut was needed here. I used my Dremel. Need to leave about 1/4 of an inch and Dremel to a depth of 1/2 inch. It's looks short, but trust me it's 1/2 inch.
 IMG_20210307_202600684 by ThePod, on Flickr
 IMG_20210307_203413751 by ThePod, on Flickr
 IMG_20210307_203429968 by ThePod, on Flickr
On to the back. Using the four drill holes from the front side, I lined up and drilled the 6 small holes on the back. Difficult to see here because the template are clear.
 IMG_20210307_204134439 by ThePod, on Flickr
Moving on, I added spacers to either side (following the Evertune youtube video) and then placed the thick bottom router template.
The six small drils 1/16 inch are used for indexing the back template. But you must sink them below the template or the router will not move across the template smoothly.
 IMG_20210307_205356787 by ThePod, on Flickr
Also hard to see here but the drills are below the routing template. I then routed this area to a depth of 1/16 of an inch.
 IMG_20210307_210541127 by ThePod, on Flickr
part 2 coming
Here is the guitar in it's native form. It's the sexy one on the left next to the sexy one on the right.
2018-10-25_09-33-16 by ThePod, on FlickrAll the hardware off and taped up for safety.
IMG_20210228_152102826 by ThePod, on FlickrThis mod is not for the faint of heart and is irreversible. So here we go. I watched and re-watched the video on the Evertune website before making any cuts.
I used these bits from Amazon and borrowed my friends router.
https://www.amazon.com/gp/product/B085T27P3Q/ref=ppx_yo_dt_b_asin_title_o00_s00?ie=UTF8&psc=1
I bought the routing templates as well as the bridge straight of of the Evertune website.
These are the top templates. I drilled the four large holes after making sure everything lined up nice and straight.
IMG_20210307_184813633 by ThePod, on FlickrMissed a photo here, but I drilled and chiseled out a little section of the base of the top wood (red square) and glued it in place to fill the area not be covered after the bridge was installed.
51018413821_0e21a31741_o by ThePod, on FlickrIMG_20210307_185123765 by ThePod, on FlickrThen I began to fully route out the top to a depth of 1 inch. I spazzed a little here and made an oopsie, not a problem because this will be covered under the bridge.
IMG_20210307_191311885 by ThePod, on FlickrOpposite side view
IMG_20210307_191319009 by ThePod, on FlickrAfter a few choice words I routed the top out to a depth of 1 inch.
IMG_20210307_195926799 by ThePod, on FlickrChamfer cut was needed here. I used my Dremel. Need to leave about 1/4 of an inch and Dremel to a depth of 1/2 inch. It's looks short, but trust me it's 1/2 inch.
IMG_20210307_202600684 by ThePod, on FlickrIMG_20210307_203413751 by ThePod, on FlickrIMG_20210307_203429968 by ThePod, on FlickrOn to the back. Using the four drill holes from the front side, I lined up and drilled the 6 small holes on the back. Difficult to see here because the template are clear.
IMG_20210307_204134439 by ThePod, on FlickrMoving on, I added spacers to either side (following the Evertune youtube video) and then placed the thick bottom router template.
The six small drils 1/16 inch are used for indexing the back template. But you must sink them below the template or the router will not move across the template smoothly.
IMG_20210307_205356787 by ThePod, on FlickrAlso hard to see here but the drills are below the routing template. I then routed this area to a depth of 1/16 of an inch.
IMG_20210307_210541127 by ThePod, on Flickrpart 2 coming
 IMG_20210307_211855443
 IMG_20210307_212021362
 IMG_20210307_212552650
 IMG_20210307_213421767
 IMG_20210307_213708185
 IMG_20210307_213714676
 IMG_20210307_215038281
 IMG_20210307_215352665
 IMG_20210307_215652156
 IMG_20210307_220552585
 IMG_20210307_220827959
 IMG_20210307_220833705
 IMG_20210307_221621939
 IMG_20210307_221644179
 IMG_20210307_221636029
 IMG_20210308_204332462
")